
Mar 5, 2021
Whether you need something to keep intruders out — or livestock in — you’ve come to the conclusion that your property needs an electric fence.
It may seem intimidating, but this type of fencing is simple to install and easy to maintain. And it’s very effective without posing a serious risk to anyone who may inadvertently touch the fence.
Advertisement
Follow these easy steps and you’ll soon have your fence set up and running.
Getting started

Your first few steps simply involve planning your fence. From creating a layout, to sorting out the supplies you’ll need, there’s a lot of front-end work to do before you can start setting up your fence.
Plan your layout
The first thing you should do is sort out exactly what you need enclosed. If you’re setting up the barrier to keep livestock in, what kind of livestock — and how many animals? What you need to fence in (or out) will be very important in determining how much fencing you need.
Once you know how much space you’re working with, your layout should come together easily.
Don’t forget to factor in how tall your fence should be, in addition to its length.
Using this information, calculate how many wires you’ll need for a fence at your desired length and height. You’ll probably find that the most cost-effective way to buy your electric wiring is by the foot from your local agricultural or home improvement retailer.
Decide how many brace corners you’ll need
For every corner and gate in your fencing, you’ll need to add a brace. Bracing helps strengthen and reinforce the areas of your fence that will face the most stress. It also protects them from damage if anything hits your fence.
The number of braces you’ll need for each corner post depends on how high your fence is. If you’re working with six or fewer wires, you should be fine with just a single brace. But if you have more than seven, you should plan to add a second.
Get enough fence posts
Consulting your layout, add up how many posts you’ll need for your fence. Be prepared: It’s likely a pretty high number, especially if you plan to build a big fence.
If you’re trying to save a few dollars, wood posts will be the cheaper option. They get the job done, but they tend to degrade over time.
Metal posts will cost a little more, but they’re also easier to install and will have a longer lifespan.
Select a charger
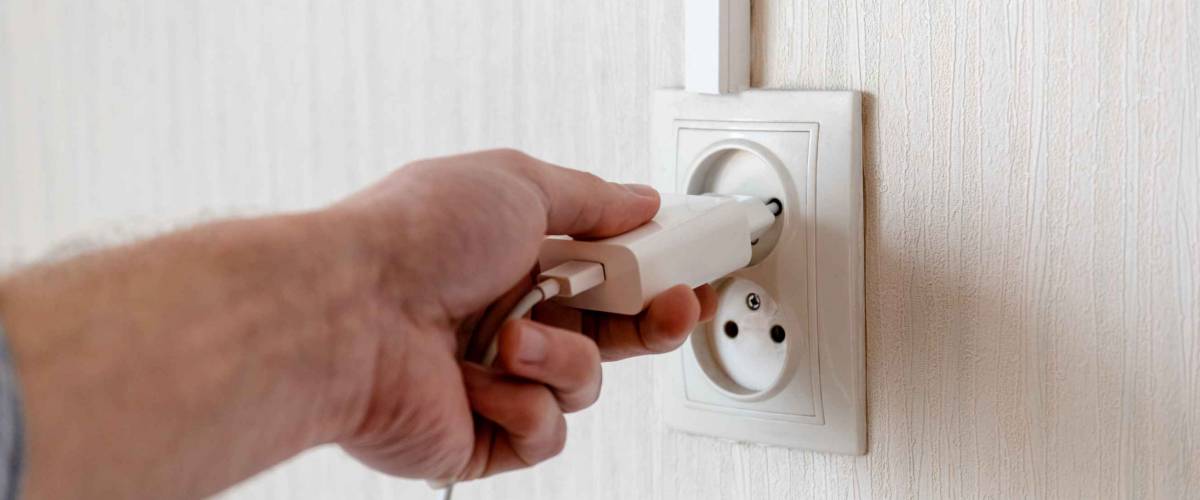
Your charger is one of the most important components of your fence. The power supplied by electric fence chargers keeps your fence running, so you’ll want to ensure you choose the right type for your enclosure.
Solar-powered chargers don’t require outlets and can be an effective, energy-efficient option, but they need a good amount of regular sunlight. Electric chargers will need access to an AC outlet.

Advertisement
Chargers that are rated in joules are better than models with foot or mile ratings. A higher rating in joules means a more consistent electric current through the wire.
How many joules you’ll need depends on the size of your enclosure. A good rule of thumb is if you’re covering 5 acres, you’ll need at least one joule.
Choose your wire
There are a number of different wire options to choose from. You can either go with straight wire, in a variety of sizes, or electric fence tape wiring.
You will find that once installed, fencing with tape is easier to see, which also makes it safer. If you go with tape, 1.5- or 2-inch poly tape, braid or rope are all suitable for most fences.
Coated wire is another option that’s easy to install and see.
When you’re choosing the size of your wiring, make sure you take into account the fence’s purpose. With a substantial fence, or when you’re dealing with larger animals, half-inch wiring isn’t going to cut it.
Must Read
- The ultra-rich use these 5 real estate strategies to build wealth while they sleep — you can start with just $100
- Here’s the average income of Americans by age in 2026. Are you keeping up or falling behind?
- Insurance companies profit most from drivers who auto-renew without shopping around. Comparing 100+ quotes takes 2 minutes and costs nothing
Join 250,000+ readers and get Moneywise’s best stories and exclusive interviews first — clear insights curated and delivered weekly. Subscribe now.
Setting up the fence

Once you're back from the store with your supplies, it’s time to start assembling your fencing.
Set up your charger
Your first task in installation is to find a secure and suitable place to set up your charger. A solar charger will need a place with lots of sunlight to keep it charged up. An electric charger will need access to an outlet and some protection from the elements.
To keep your charger safe, hang it somewhere out of the way, such as on a post or on the wall of an outbuilding, like a shed or stable.
When you’ve set up the charger, leave it — and make sure it stays off until you’re finished installing the fence.
Put in your grounding posts
Grounding posts will protect your fence from surges in electricity. You’ll need at least one 6-foot grounding rod, ideally two, for this. Place your first rod near the charger and set it into the ground, leaving at least two inches above ground.
Advertisement
If you decide to use a second grounding post (it’s a good idea), place it about 10 to 20 feet away from the first rod, and install in the same manner.
Attach a grounding wire
To increase the safety of your fence, you’ll need a grounding wire that runs from the ground terminal of the charger to the grounding posts. Use a grounding clamp to secure the wire to the grounding posts.
Install your fence posts

Using a post-hole digger, set your fence posts securely in the ground. You can use a long string to make sure you’re installing your posts in a straight line, and to mark the distance between them.
To ensure maximum stability, install your posts with one-third of their length underground. The same ratio applies to your corner posts, but they should also be slightly thicker than your side posts.
One common mistake when installing fence posts is to use too many, assuming they'll make your fence sturdier. Posts can be up to 40 feet apart. If you’ve got them distanced farther apart than that, use wire stays to keep your wires evenly spaced and for a little extra stability.
Set up braces on corners and gates
Back in the planning stage, you determined how many corner braces you were going to need. Now that you’ve got your posts set up, you’ll want to install the braces.
If a traditional brace doesn’t suit you, you can also use a cement footing or anchor.
Another option popular with cattle ranchers is a “floating diagonal” brace, which has the brace post notched just below the top of the corner post, with its other end set on the ground opposite the corner.
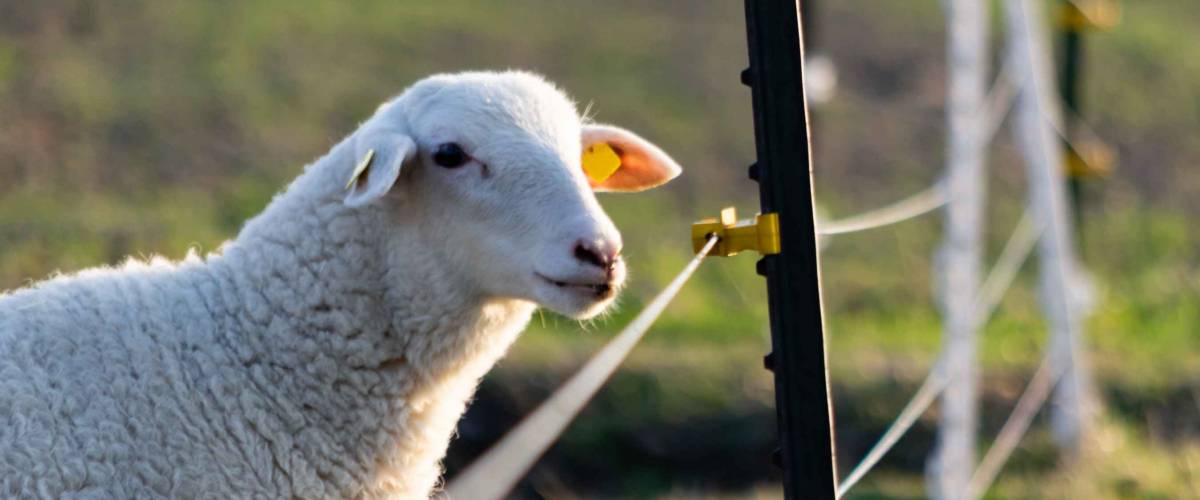
Mount the insulators
Insulators will help you keep the electricity running through the wires, not the posts. The type of insulators you should use will depend mostly on the wiring you’ve selected.
The most common insulators are designed with enough space to accommodate braided or rope style wiring without causing friction or rubbing of the wire.
Run the wire
All that’s left to finish setting up your fence is running the wire.
Start at the post farthest from your charger. Using the connector clamps that come with the wiring, hang your lines.
Advertisement
You’ll need to make certain your wires are taut. There are a few different tools you can use to accomplish this: a self-locking ratchet-style wire tensioner, a come-along cable puller or a turnbuckle cable tensioner.
Whichever method you use, be careful — because too much tension can cause the wiring to break, which can lead to serious injuries.
Test your line and maintain it
Now that it’s all set up, it’s time to make sure your electric fence is in working order.
Turn the charger on
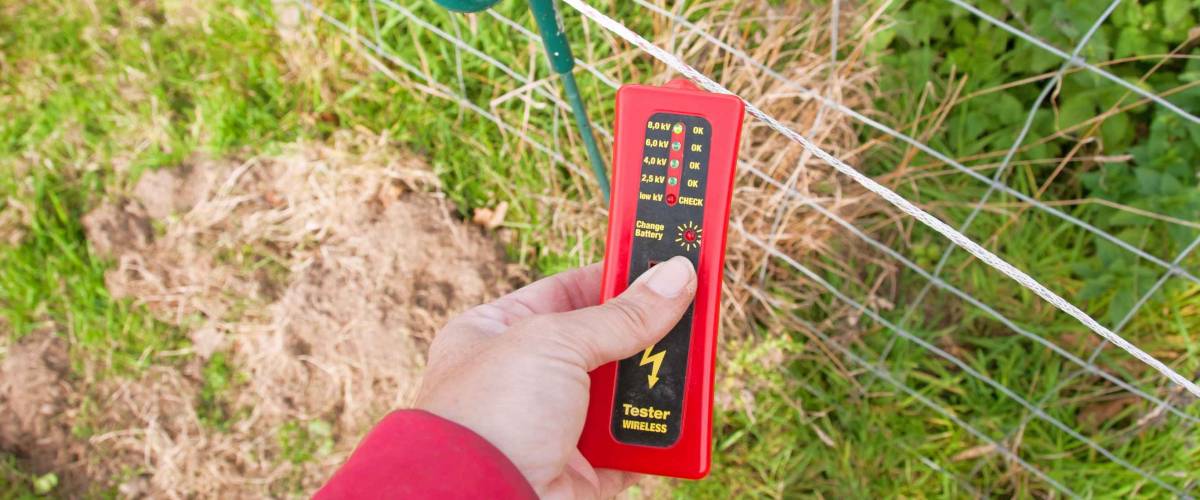
Make sure everyone and everything is clear of the fence and then turn your charger on. Using a voltmeter, make sure the electricity is flowing through the entire fence.
Take note of the voltage reading; you’ll want to check back regularly to see that it stays consistent. When it’s unconnected to the fence, the number should vary between 6,000 and 10,000 volts, depending on the strength of your charger.
Charge the line
With your baseline reading, you’re now ready to charge the line. Turn the charger back off for this task.
Using a jumper wire, connect the lines. And, with another jumper wire, connect the top wire of the fence to the charger.
Recheck the voltage
Now that everything is connected, recheck all your lines before you turn the charger back on.
This time, check the voltage while standing at a point as far from the charger as possible. It’s normal to see a drop in voltage, but it shouldn’t be more than 2,000 volts. If your charge has dropped more than that, your fence likely has a short-circuit or some kind of interference.
Once you’ve figured out what the issue is and have resolved it, check the lines again. If the voltage drop is within the 2,000 range, you’re good to go.
Schedule daily checks of the current
Although your fence is up and working, it’s going to need regular maintenance. Checking your current daily will prevent signal problems and ensure you can deal with any issues sooner rather than later.
Both moisture and vegetation can leech the current on your fence wires. If you’re getting lower than usual voltage readings, you should closely inspect the fence to see what may be causing the problem and get it sorted.
Keep shrubs and weeds away from your fence
You should also regularly walk your electric fence line to ensure nothing is growing against it that may interfere with its effectiveness. Grass, weeds or shrubbery can all lead to a loss in voltage. Remove anything that grows along the perimeter, and treat the area with a herbicide to prevent further growth.
You May Also Like
- JP Morgan sees gold hitting $6,000/oz before 2027 — and a Gold IRA lets you hold the physical metal while deferring the tax bill. Get your free guide from Priority Gold
- Dave Ramsey warns nearly 50% of Americans are making 1 big Social Security mistake — here’s what it is and the simple steps to fix it ASAP
- Thanks to Jeff Bezos, you can now become a landlord for as little as $100 — and no, you don't have to deal with tenants or fix freezers. Here's how
- Millionaires under 43 are reshaping investing — just 25% of their portfolios are in stocks. Here’s where their money is going

Sigrid is a deputy editor on the Moneywise team, where she has also worked in a number of editing and reporting roles. She has 5 years experience writing about personal finance and takes great pride in demystifying complex financial issues and finding the personal in personal finance topics.


Mortgages • Feb 17


